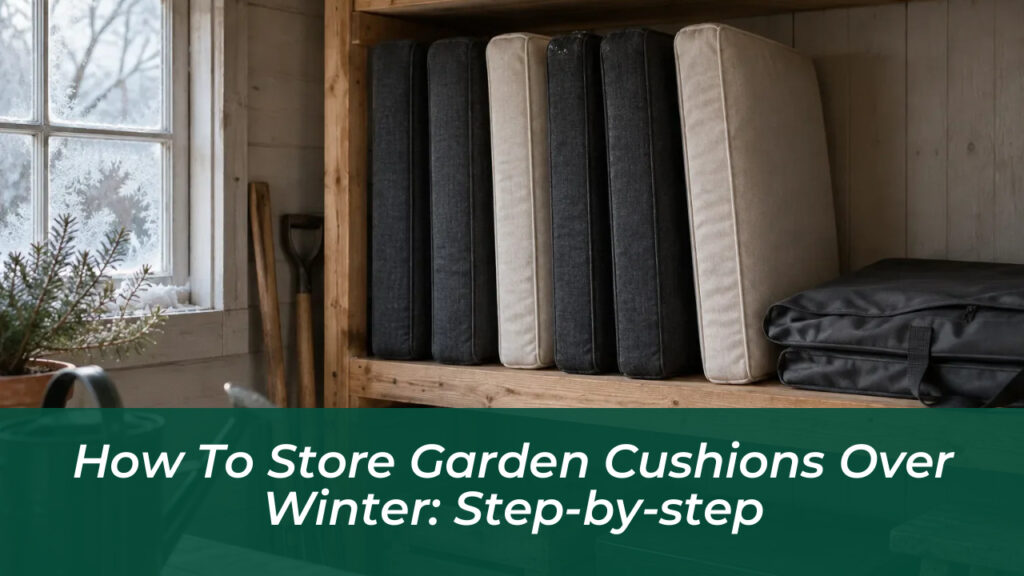
When the crisp air of autumn settles in and you pack away your garden furniture, patio cushions often get overlooked. Yet, high-quality outdoor cushions represent a significant investment in your backyard comfort. Leaving them exposed to freezing temperatures, relentless rain, and drifting snow is a fast track to ruined fabrics, broken-down foam, and stubborn mold. Proper winter storage safeguards your investment, ensuring your seating remains fresh, vibrant, and ready for the first warm weekend of spring.
Why Leaving Cushions Outside Over Winter is a Mistake
Many homeowners assume that because outdoor fabrics are advertised as weather-resistant, they can withstand a full winter season outdoors. While these textiles handle summer sun and sudden rain showers quite well, prolonged exposure to freezing winter moisture is an entirely different challenge. The internal foam core of a garden cushion acts just like a sponge. When continuous ice, snow, and damp air surround the cushion, moisture penetrates the outer shell and settles deep inside the padding.
As temperatures fluctuate above and below freezing, that trapped water expands and contracts, breaking down the structural integrity of the foam. Dark, damp environments are breeding grounds for mold and mildew spores. Once mold establishes itself inside the foam filling, it is exceptionally difficult to eradicate completely, leaving you with unpleasant odors and unsightly black spots that ruin the aesthetic of your outdoor living space.
Step 1: Thoroughly Clean and Clear Debris
Never pack away dirty cushions. Throughout the spring and summer, outdoor fabrics accumulate invisible layers of pollen, food crumbs, bird droppings, dust, and body oils. If left on the fabric over winter, these organic particles feed mold growth and attract pests.
- Dry Brushing: Start by brushing off loose leaves, dirt, and dried debris using a soft-bristled brush or a dry cloth. An upholstery attachment on your vacuum cleaner works wonders for sucking dirt out of deep seams and zipper tracks.
- Washing Removable Covers: If your cushions feature zippered slipcovers, take them off and launder them according to the manufacturer’s instructions. Usually, a gentle machine wash cycle with mild, non-abrasive liquid detergent will do the job.
- Hand-Washing Non-Removable Covers: For cushions without removable covers, mix a solution of one gallon of warm water and a few tablespoons of gentle dish soap. Dip a soft scrub brush or sponge into the mixture and gently scrub the surfaces, paying special attention to stained areas.
- Rinsing Completely: Use clean water on a damp cloth or a gentle garden hose spray to remove every trace of soap residue. Soap left in the fabric can attract and hold moisture during storage.
Step 2: Allow Absolute and Complete Drying
This is the single most critical step in the entire winter storage process. If you pack away cushions that are even slightly damp in the center, you are practically guaranteeing a major mold infestation by springtime. Surface drying can be deceiving; the outer fabric might feel warm and dry while the foam core remains damp and clammy.
Set your cushions and covers out in a warm, dry area with excellent airflow. A sunny patio on a clear day is ideal. Stand larger cushions up on their edges rather than laying them flat, as this allows air to circulate evenly around both sides. For thick lounge chair or sofa cushions, allow at least two to three full days of drying time. Feel the middle of the cushion firmly; if it feels cool to the touch, it still contains moisture and needs more time to air out.
Step 3: Inspect and Treat Stubborn Stains or Mildew
Before moving your cushions into long-term storage, carefully inspect them for any remaining blemishes, tears, or early signs of mildew. Catching these problems now prevents them from worsening inside a dark storage area.
If you notice mildew spots, mix a solution of one cup of mild soap, one cup of liquid bleach (if approved by the fabric care label), and a gallon of warm water. Lightly sponge the mixture onto the affected areas, let it sit for about ten to fifteen minutes, and then rinse thoroughly with clean water. For greasy food or sunscreen stains, sprinkle cornstarch or baking soda over the spot, let it sit to absorb the oils, and vacuum it away.
Step 4: Select the Ideal Indoor Storage Location
Where you store your cushions matters just as much as how you clean them. The optimal storage environment is cool, dry, and protected from extreme humidity and temperature swings. Great options include:
- A clean, dry garage or basement (provided it does not flood or retain excessive dampness)
- An interior hall closet or spare room storage closet
- A dedicated backyard storage shed that is tightly sealed against weather leaks
Avoid storing cushions directly in attics that lack proper insulation, as extreme temperature fluctuations can create heavy condensation. Similarly, crawl spaces should be avoided due to high ground humidity and vulnerability to rodents.
Step 5: Choose Breathable Storage Containers
One of the most common mistakes people make is sealing their garden cushions inside heavy plastic trash bags or airtight commercial plastic bins. While plastic seems like a foolproof shield against water, it actually traps ambient humidity and condensation inside, creating a greenhouse effect that breeds mold rapidly.
Instead, choose breathable storage solutions. Breathable canvas bags, fabric storage cubes, or even wrapping the cushions in clean cotton bedsheets will keep dust off while allowing trapped moisture to evaporate safely. If you prefer using plastic deck boxes outdoors or storage bins in a shed, ensure the boxes are explicitly rated waterproof, and consider adding moisture-absorbing silica gel packs inside to combat humidity.
Step 6: Elevate Cushions and Prevent Compression
Never stack your garden cushions directly on a concrete garage or basement floor. Concrete floors constantly draw up moisture from the ground, which will slowly seep into the bottom layers of your stack. Always place your cushions on elevated shelving units, wooden pallets, plastic storage racks, or raised platforms.
When arranging your stack, pay close attention to weight distribution. Avoid heavy, high stacks that compress the foam core for months on end. If foam remains squashed under heavy weight all winter, it can permanently lose its resilient bounce, leaving you with flat, uncomfortable seating when summer returns. Arrange them loosely, leaving a little bit of breathing room between stacks so air can circulate freely.
Mid-Winter Checkups for Peace of Mind
Once your garden cushions are cleaned, dried, and safely tucked away, your job is mostly done until spring. However, if you live in an exceptionally wet or humid climate, it is wise to check on your storage area once or twice during the winter months. Open the shed or closet door, feel the outer covers, and check for any musty odors. Catching a stray roof leak or a spike in humidity early gives you the chance to reposition your cushions and air them out before any real damage occurs.
By investing a couple of hours in proper cleaning, meticulous drying, and intelligent storage at the end of the season, you will bypass the frustration of buying expensive replacements next year. When warm weather finally returns, your cushions will emerge fresh, clean, and wonderfully comfortable, ready to welcome you back to your outdoor oasis.