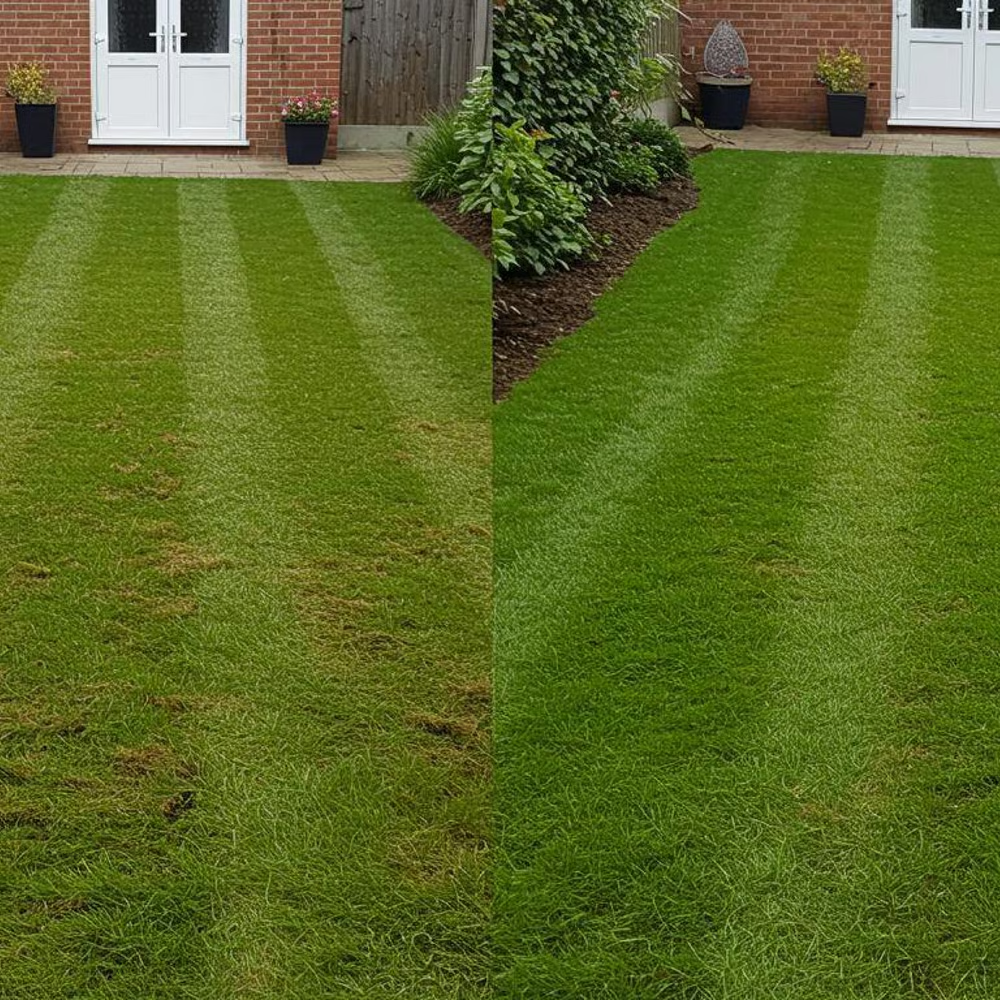
If your lawn feels spongy underfoot, looks thin and tired, or is slowly being choked out by stubborn green moss, it is crying out for a deep cleanup. Over time, every healthy piece of turf accumulates a dense underlayer of dead grass clippings, creeping moss, and organic debris known as thatch. When this matted layer exceeds one centimetre in depth, it acts like an impenetrable roof, blocking essential moisture, air, and nutrient penetration from reaching the root zone. Scarifying is the mechanical process of slicing vertically through this debris to pull it up, clear the surface, and stimulate vigorous new grass growth. While the garden might look a little worse for wear immediately afterward, mastering the correct timing and technique will transform a patchy, moss-ridden sward into a lush, vibrant green carpet.
What Does Scarifying Actually Do for Your Turf?
Understanding the underlying mechanics of scarification helps clarify why the process is so vital for long-term lawn vitality. Left to its own devices, grass constantly sheds older blades, roots, and runners. Under normal conditions, soil microorganisms break this down into natural organic matter. However, heavy clay soils, frequent shallow watering, and excessive nitrogen fertilisation cause this debris to accumulate much faster than nature can digest it.
The resulting thatch layer creates several compounding problems for UK homeowners:
- Moisture Blockage: A thick thatch mat absorbs light summer rain before it ever hits the soil, leaving plant roots parched while the surface remains stubbornly wet.
- Nutrient Starvation: Expensive granular or liquid fertilisers get trapped in the upper fibrous layer rather than feeding the root system deep below.
- Moss and Disease Breeding Grounds: The damp, stagnant microclimate trapped beneath dense thatch provides the ultimate incubator for moss spores and fungal pathogens.
By using sharp steel blades or rigid wire tines to slice through this matted accumulation, you physically strip away the suffocating debris. This drastic intervention opens up the soil surface, allowing oxygen to circulate freely around the root crowns and paving the way for aggressive, healthy tillering.

When Is the Best Time to Scarify a UK Lawn?
Timing is everything when it comes to turf renovation. Because scarification is an aggressive procedure that temporarily stresses the grass plants, you must align your efforts with the natural seasonal growth cycles of cool-season UK grasses.
The absolute prime window for a deep, comprehensive scarification is early autumn (late August through October). During these months, daytime temperatures remain comfortably mild, summer heat stress has faded, and reliable autumn rainfall returns. The soil retains its warmth absorbed across June and July, creating an ideal incubation environment for new grass roots. An autumn scarification gives the lawn six to eight weeks of active growth to fully recover and thicken before winter dormancy sets in.
Spring (late March through April) offers a secondary, lighter window for intervention. However, spring scarification should generally be restricted to gentle moss-clearing using wire tines rather than aggressive heavy blade cutting. Deeply scarifying in spring leaves the lawn vulnerable just as rising summer temperatures and potential drought periods arrive.
You must strictly avoid scarifying during periods of frost, freezing temperatures, or prolonged summer droughts. Working on frozen ground will shatter plant crowns, while dry, baked soil will tear root systems apart and prevent any chance of natural recovery.
Choosing the Right Tools for the Job
Selecting appropriate equipment depends entirely on the physical size of your garden, the thickness of your thatch layer, and your physical fitness levels.
Manual Spring-Tine Rakes
Best suited for compact front gardens or small courtyards under 50 square metres, a manual scarifying rake relies purely on human muscle. These tools feature curved, razor-sharp wire tines designed to comb through the turf canopy. While budget-friendly and gentle, preparing a medium-sized lawn by hand requires serious physical exertion and a high level of stamina.
Electric Scarifiers
For average suburban gardens ranging from 50 to 200 square metres, mains-powered or battery-operated electric scarifiers provide the ultimate sweet spot. They feature adjustable rotating drums packed with steel blades that slice consistently to a pre-set depth. They are relatively quiet, highly efficient, and take the grueling physical labor out of the task.
Petrol Scarifiers
If you manage expansive country gardens, large open lawns, or heavily neglected commercial turf spaces exceeding 200 square metres, a heavy-duty petrol scarifier is essential. These professional-grade machines offer uncompromised cutting power, wider clearing widths, and the torque required to rip through years of deep-seated moss and compacted organic buildup.
Step-by-Step Guide: How to Scarify Your Lawn Properly
Executing the process with methodical care ensures maximum efficiency while safeguarding the long-term integrity of your turf foundation.
Step 1: Prepare and Mower the Grass
Two to three days prior to scarifying, give your lawn a low cut, bringing the height down to approximately 2.5 to 3 centimetres. This reduction removes surplus top growth so that scarifier blades can target the thatch layer directly without bogging down or tearing the grass blades prematurely. Ensure you collect all grass clippings and clear away any sticks or stones.
Step 2: Check Soil Moisture and Weather Conditions
Aim for a dry, overcast day when the surface soil is dry to the touch but retains a hint of moisture deep down. Never scarify waterlogged, squelching ground, as heavy machine weight will severely compact the soil structure and tear grass roots entirely out of the earth.
Step 3: Set Your Blade Depth Correctly
Adjust your scarifier so the blades or tines barely kiss the surface of the soil-typically penetrating just 2 to 3 millimetres deep. Setting the machine too deep on your initial pass will scalp the lawn, shred live turf crowns, and create unnecessary recovery hurdles.
Step 4: Execute a Two-Way Cross-Pattern
Push your scarifier in straight, parallel lines across the entire length of the lawn. Once completed, make a second pass perpendicular to your first direction-essentially creating a grid or cross-hatch pattern. This dual-direction approach guarantees that matted thatch running at different angles is thoroughly lifted and extracted.
Step 5: Clear Away Debris
Use a spring-tine garden rake or a powered lawn sweeper to collect all the pulled-up moss, dead grass, and organic waste. Be prepared for a shock regarding the sheer volume; an average suburban garden can easily yield several large wheelbarrow loads or multiple garden waste bags of debris. This organic material makes fantastic additive matter for your compost heap if mixed correctly with green waste.

Essential Post-Scarification Aftercare
Your lawn will look sparse, patchy, and distinctly distressed immediately after a thorough scarification. Do not panic; this is an entirely normal stage of turf renovation. The recovery process relies heavily on immediate, intentional aftercare.
Overseeding Bare Patches
Because the scarification process rips out moss and dead material, patches of bare soil will inevitably be exposed. Within 48 hours of completing the work, scatter a high-quality grass seed blend over these gaps at a rate of 25 to 35 grams per square metre. Lightly rake the seeds into the soil surface to ensure strong seed-to-soil contact.
Applying a Recovery Fertiliser
Feed the lawn with a specialized, slow-release autumn lawn fertilizer high in potassium and balanced nitrogen. This nutrient injection supercharges root development, strengthens cell walls against incoming winter frosts, and fuels rapid recovery growth.
Managing Moisture and Foot Traffic
Keep the soil consistently moist for the first three to four weeks by watering lightly twice daily during dry spells. Avoid heavy foot traffic, children’s play, and pets running across the treated area until the new grass seedlings have established and reached at least five centimetres in height.
Frequently Asked Questions
How long does a lawn take to recover after scarification?
When performed during the ideal autumn window with proper feeding and watering, visible recovery and green-up occur within two to four weeks. Full density restoration and complete coverage of bare patches typically take between six to eight weeks.
Can I scarify a newly laid turf lawn?
No. You must allow any newly seeded or turfed lawn at least twelve full months to establish a deep, robust root system before attempting any form of mechanical scarification. Young grass plants lack the structural anchor required to survive the aggressive pulling action.
Will scarifying completely eliminate moss from my garden?
Scarifying physically removes existing moss colonies, but it does not fix the root environmental causes. If your lawn suffers from persistent shade, heavy clay compaction, poor drainage, or acidic soil conditions, moss will eventually return unless you address those underlying issues through aeration, drainage improvement, and pH balancing.
Should I water my lawn before scarifying?
Only water if your soil is bone-dry and rock-hard due to a summer heatwave, and do so a few days in advance so the ground absorbs the moisture. The soil should be firm, dry on top, and slightly yielding underneath-never soggy, muddy, or wet.