
A large mirror positioned above a mantel instantly commands attention, anchoring the room and bouncing natural light across the space. Yet, mounting a substantial piece of glass onto masonry or drywall requires more than a simple hammer and nail. Heavy statement mirrors demand precise structural planning, correct weight distribution, and specialized hardware to ensure safety and visual harmony. Getting this design feature right transforms your hearth into a stunning architectural focal point without risking structural failure.
Proportions and Scale
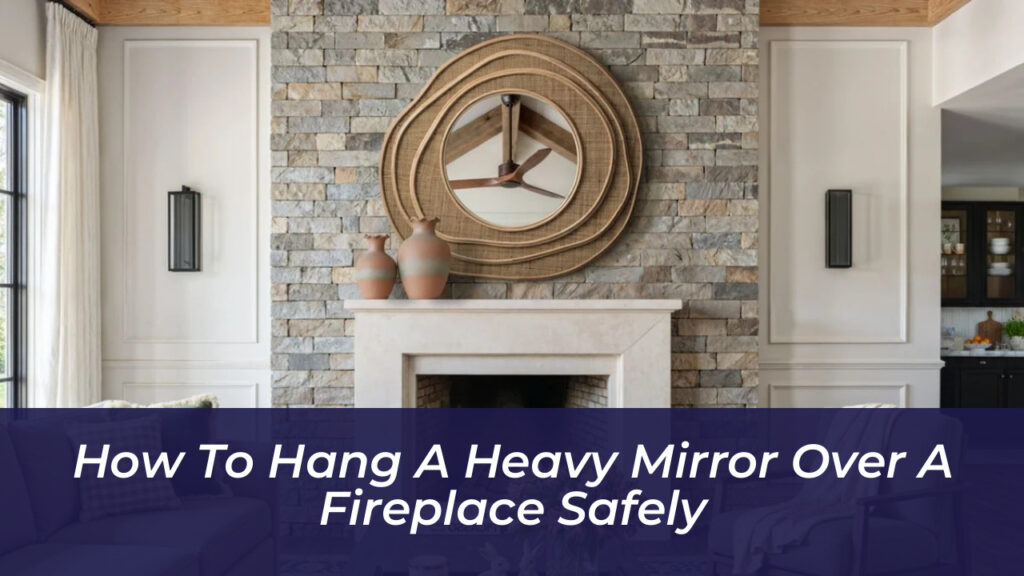
Proportion dictates whether your fireplace setup looks intentional or awkward. A common misstep is selecting a piece that fights the dimensions of the room rather than complementing them. Your mirror width should generally measure between two-thirds and three-quarters the total length of your mantel. This leaves a comfortable margin of empty space on either side, grounding the entire composition.
When evaluating height, aim for a gap of roughly four to six inches between the top of the mantelpiece and the bottom edge of the frame. Leaving too much dead wall space breaks the visual connection between the hearth and the mirror, while hanging it too low can crowd your seasonal mantel decor. If your ceilings soar past standard heights, a vertical orientation helps lift the eye upward and emphasizes the vertical expanse of the room.
Choosing the Right Hardware for Your Wall Type
Fireplace surrounds feature varied construction materials, from classic red brick and stacked stone to smooth drywall and tile. Each surface requires distinct mounting techniques to support heavy loads securely. Standard plastic wall plugs will fail under the sustained weight of a large wooden or iron-framed mirror.
- Brick and Masonry: Use masonry bits to drill precise pilot holes into the mortar joints rather than the brick itself when possible, inserting heavy-duty sleeve anchors or masonry expansion bolts. If drilling directly into stone, professional-grade toggle anchors provide superior holding power.
- Drywall over Wood Framing: Locate the wooden studs behind the drywall using an electronic stud finder. Whenever possible, drive heavy-duty wood screws directly into at least one structural stud. For off-center placements, employ rated toggle bolts that spring open behind the wallboard.
- Tile Surrounds: Drill slowly through ceramic or porcelain tile using a specialized carbide-tipped glass and tile bit to prevent cracking, anchoring firmly into the backing material behind the tile.
Step-by-Step Installation Process
Hanging a heavy mirror safely demands patience and methodical execution. Rushing the process increases the likelihood of crooked placements or dropped valuables. Enlist a helper to support the weight while you mark heights and test clearances.
1. Create a Full-Scale Paper Template
Cut a sheet of brown kraft paper or newspaper to the exact dimensions of your mirror. Tape this template directly onto the wall above the mantel using blue painter’s tape. Step back across the room, sit on your sofa, and evaluate the placement from various angles. This five-minute step prevents unnecessary holes in your wall.
2. Locate and Mark Anchor Points
Measure the hanging hardware on the back of the mirror precisely. Transfer these exact measurements to your paper template, marking your drill points with a pencil. Remove the paper, keeping your pencil marks visible on the wall surface.
3. Install the Fasteners
Drill pilot holes according to the specifications of your chosen anchors. Insert your masonry shields, molly bolts, or toggle fasteners, and drive the mounting screws in firmly. Leave the screw heads protruding by roughly one-quarter of an inch so your D-rings or heavy-duty hanging wire can slide securely into place.
4. Hang and Slowly Release
Lift the mirror with a partner, guiding the hanging hardware over the secured wall screws. Slowly and cautiously transfer the weight of the mirror to the wall brackets, keeping your hands underneath the frame until you are completely certain the hardware is holding the load.
Protecting Your Mirror from Fireplace Heat
Heat management is a critical factor frequently overlooked by homeowners. Wood-burning and high-output gas fireplaces generate significant thermal updrafts that travel straight up the face of the brick. If your mirror hangs too close to the opening, continuous heat exposure can warp wooden frames, dry out natural rattan fibers, or soften the adhesive holding the glass pane in place.
Maintain a minimum clearance of six to eight inches between the mantel surface and the bottom of your mirror if you use your fireplace regularly. For decorative, non-working hearths, you can afford to mount the piece slightly lower for a more intimate aesthetic.
Styling the Mantel Beneath
A heavy mirror creates the visual weight; your mantel styling completes the narrative. Avoid cluttering the ledge with dozens of small items. Instead, layer a few intentional pieces that complement the frame. Tall taper candlesticks can balance a wide, heavy arch, while a low ceramic vessel or a stack of hardcover books breaks up rigid vertical lines. Varying heights and textures ensure the display feels collected rather than crowded.
Maintenance and Long-Term Safety
Mirrors mounted over active hearths accumulate soot, dust, and smoke residue much faster than those in other rooms. Clean the glass weekly using a soft microfiber cloth sprayed lightly with glass cleaner, avoiding harsh chemical sprays that can seep into wooden joints or antique frames. Periodically check your wall anchors to ensure the weight of the mirror has not caused any loosening over time, guaranteeing a secure display for years to come.