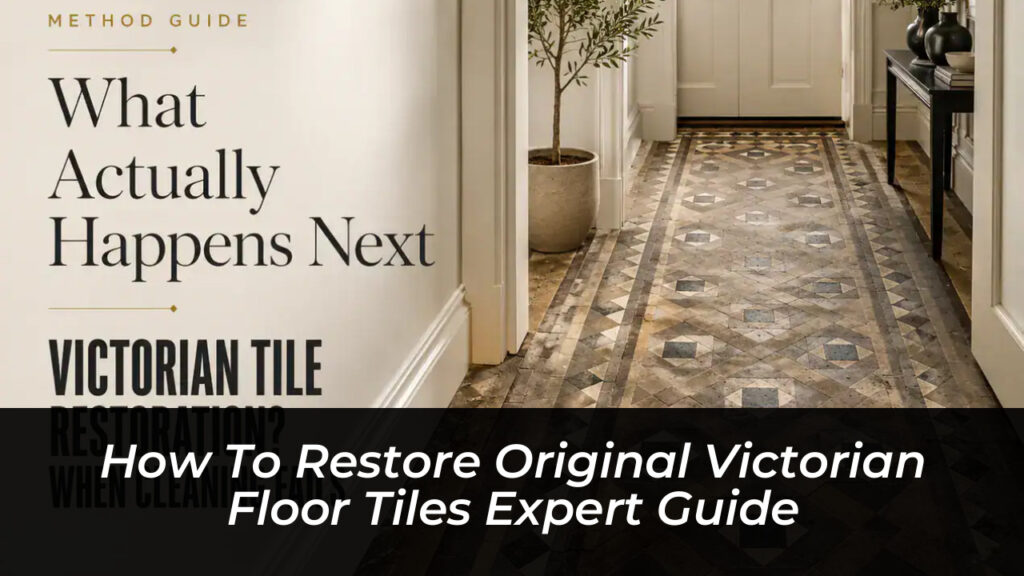
Stepping into a period hallway graced by authentic geometric or encaustic tiles connects you directly to the craftsmanship of the late nineteenth century. However, decades of foot traffic, accumulated wax, inappropriate cleaning products, and hidden moisture issues often leave these historic surfaces looking dull, patchy, and exhausted. Restoring original Victorian floor tiles is not a weekend DIY project that you can rush with standard household detergents and a stiff mop. It requires patience, a thorough understanding of historic clay composition, and a methodical approach to cleaning, repairing, and sealing.
Before lifting a single tool or applying chemical strippers, you must understand what lies beneath the surface. Original Victorian floors were rarely laid with modern convenience in mind. Unlocking their historic beauty demands respect for the materials, precise diagnostic skills, and a refusal to cut corners.
The Composition of Historic Victorian Tiles
Victorian tiled floors typically feature one of three distinct tile types: dust-pressed plain tiles, intricate encaustic tiles with clay slips inlaid to form patterns, or durable quarry tiles. Understanding these variations is essential because treating an unglazed encaustic tile the same way you might treat a modern ceramic tile will cause irreversible damage.
Most Victorian floor tiles are full-bodied, meaning the colour runs right through the depth of the clay body, except for the pattern layer on encaustic varieties. What many homeowners mistake for permanent fading is actually a dense accumulation of surface dullness, old sealers, grease, and ground-in dirt. Because these historic floors were traditionally laid edge to edge over lime screed or ash bedding with virtually no modern grout lines, they behave differently than contemporary tiled surfaces.
Crucially, these floors lack modern damp-proof membranes. They rely entirely on the natural, slow evaporation of moisture through the porous clay body and lime mortar joints. Sealing them incorrectly or trapping moisture beneath an impermeable synthetic coating invites salt efflorescence, spalling, and loose tiles.
Assessing Damage, Movement, and Subfloor Integrity
A successful restoration begins with a comprehensive physical assessment. Walk across the floor slowly, listening for hollow sounds and feeling for uneven, raised, or sunken sections. Movement underfoot usually indicates that the underlying lime mortar screed has degraded, often due to historical plumbing or electrical installations running beneath the hallway.
Look closely at the perimeter and high-traffic thresholds. You will frequently find:
- Black bitumen or yellow-green carpet adhesive from twentieth-century floor coverings.
- Chipped or drilled tile edges caused by old carpet gripper rods.
- Powdery white mineral deposits (efflorescence) driven upward by rising damp.
- Castellated or “lipped” tiles resulting from previous poor-quality repairs using rigid modern cement.
Attempting to clean or seal a floor with structural movement is counterproductive. Loose tiles must be carefully lifted, the failed bedding scraped away, and the substrate stabilized using lime-compatible materials before any cosmetic restoration can proceed.

Step-by-Step Deep Cleaning Without Damaging Historic Clay
Standard mopping merely redistributes dirty residue across a porous Victorian floor. To strip away decades of grime, old waxes, and failed acrylic sealers safely, you must employ a controlled, phased cleaning protocol.
1. Dry Debris Removal
Begin by sweeping the floor thoroughly with a soft broom or using a vacuum cleaner with a brush attachment. Eliminating loose grit prevents abrasive scratching during the wet cleaning phases.
2. Stripping Old Coatings and Residue
If the tiles feel sticky, look greasy, or display patchy white veiling, you are likely dealing with trapped waxes or old synthetic sealers. Apply a specialized, high-alkaline tile cleaner or professional wax stripper designed for natural stone and unglazed clay. Protect your skirting boards with low-tack masking tape, as these powerful formulations can strip household paint.
Work in manageable sections. Apply the stripper, allow it a dwell time of ten to fifteen minutes to break down the ingrained contamination, and keep the surface wet so the solution does not dry out. Gently agitate the solution using a natural-bristle brush or a non-scratch pad, employing circular motions to lift dirt from the microscopic pores of the clay.
3. Slurry Extraction
Never let the dirty cleaning slurry dry back onto the floor. Use a wet vacuum extraction system to pull the suspended grime and liquid completely out of the tile pores. Rinse the area repeatedly with clean water until the rinse water remains crystal clear.
4. Neutralizing Cement and Grout Haze
If your floor has been recently repointed or retains stubborn plaster and cement splashes from building work, apply a specialized acid-free cement and grout haze remover. This step neutralizes residual alkalinity and clears cloudy mineral films that obscure the true earthy tones of the tiles.
Sourcing and Replacing Broken or Missing Victorian Tiles
Missing or severely cracked tiles disrupt the geometric harmony of a Victorian floor. Finding exact matches requires diligence. You should never force a modern metric tile into a historic imperial layout.
Source authentic salvaged materials from reputable architectural reclamation yards, ensuring that the thickness, shade, and square edge match your existing floor. If original replacements are unavailable, commission specialist reproduction tiles manufactured to true imperial dimensions.
When inserting a replacement tile, carefully chisel out the old bedding material to ensure the new piece sits completely flush with its neighbors. Avoid proud or sunken installations, which break the smooth plane of the hallway and create trip hazards.
Drying Phase: The Crucial Waiting Period
Patience dictates the success of a Victorian tile restoration. After intensive wet cleaning and repairs, your floor must be allowed to dry completely. Because unglazed clay and historic lime subfloors retain moisture deeply, this drying process can take anywhere from five to ten days depending on ambient humidity and central heating.
Sealing a damp Victorian floor is a critical error. Trapped moisture reacts against the applied sealer, resulting in milky white patches, poor adhesion, and eventual peeling. Monitor moisture levels closely before opening cans of sealant.
Selecting and Applying the Correct Sealer
Once the floor is bone dry, applying a protective barrier is essential to prevent future staining and ease routine maintenance. However, you must choose the right formulation based on your property’s environmental conditions.
- Breathable Enhancing Sealers (Low-Sheen): Ideal for dry hallways and interior spaces. These treatments slightly deepen the natural earthy red, buff, and black tones of the clay while imparting a subtle satin sheen. They protect against liquid spills without locking underlying moisture completely out of the structure.
- Impregnating Sealers (Matt Finish): Essential for damp-prone areas, ground-floor bathrooms, or properties lacking a damp-proof membrane. These invisible sealers penetrate the pore structure to repel water and oils directly without altering the natural, historic matt appearance of the tiles.
Apply the chosen sealer evenly using a foam roller, brush, or lint-free cloth across manageable sections. Allow the first coat to penetrate for approximately fifteen minutes, then buff away any excess pooling before it cures into a sticky film. Apply a second coat to ensure complete, uniform protection.
Long-Term Maintenance and Care for Restored Victorian Floors
A professionally restored Victorian floor transforms the character of an entire home, but preserving that investment demands a disciplined maintenance routine.
- Daily Grit Control: Sweep or vacuum frequently. Fine sand and grit act like sandpaper underfoot, wearing away the historic clay surface over time.
- Gentle Cleaning Agents: Abandon harsh supermarket floor cleaners, bleach, and steam mops. Use exclusively neutral pH stone and tile cleaning fluids diluted in warm water.
- Protective Barriers: Place high-quality coir doormats at exterior entrances to trap moisture and abrasive dirt particles before they reach your hallway. Affix felt pads to the legs of any furniture resting on the tiled surface.
- Periodic Inspection: Check high-traffic pathways every twelve to eighteen months. If water no longer beads on the surface, the protective barrier is thinning, and a fresh maintenance coat of impregnating sealer should be applied.
Restoring original Victorian floor tiles demands respect for historic materials and meticulous execution. By avoiding aggressive shortcuts, managing moisture carefully, and maintaining the surface with appropriate care, you preserve a stunning piece of architectural heritage for generations to come.