
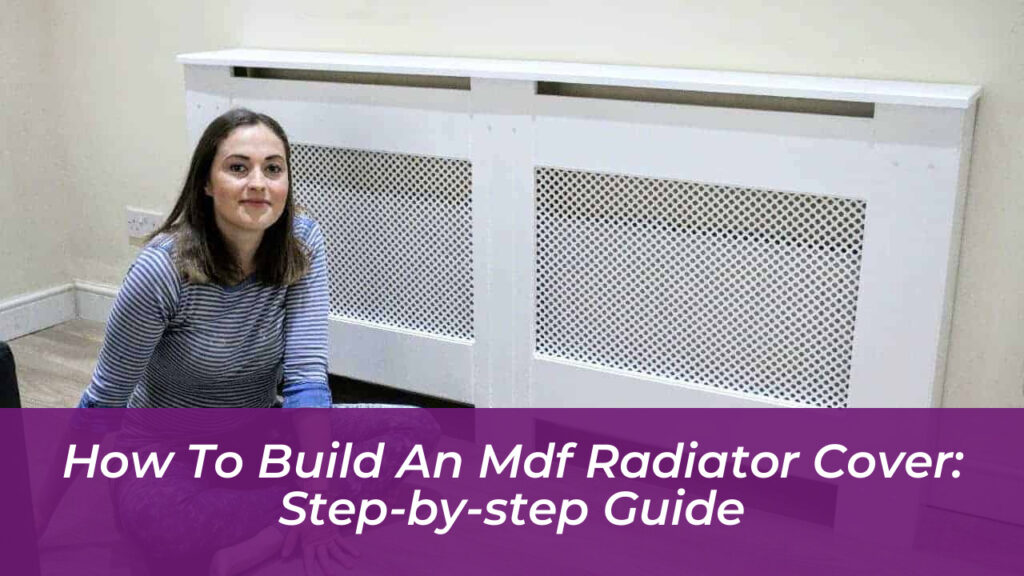
Cast iron and panel radiators keep homes warm when the weather turns cold, but they rarely win any style awards. Building a custom MDF radiator cover hides bulky heating units, protects children and pets from accidental burns, and provides a handy display shelf for decor. Store-bought options often fail to fit awkward dimensions or restrict vital airflow. Constructing a unit yourself gives you absolute control over sizing, ventilation, and style without breaking the bank.
Why Choose MDF for Your Radiator Cover?
Medium-density fiberboard stands out as the premier material for radiator enclosures. Unlike natural timber, MDF resists warping from the alternating thermal cycles of heating units. It provides a smooth surface that accepts primer and paint exceptionally well, allowing the finished piece to blend seamlessly with existing baseboards and trim. Large sheets remain budget-friendly and easy to source at any local home improvement center.
Safety and heat management require careful planning. While any enclosure captures a small percentage of thermal output, proper design mitigates this effect. Incorporating adequate clearances, an open bottom, and a front grille ensures warm air circulates freely into the room rather than getting trapped against the wall.
Tools and Materials Required
Assembling a sturdy enclosure requires a specific set of woodworking tools and supplies. Gathering everything beforehand streamlines the build process and prevents mid-project trips to the hardware store.
- 18mm MDF boards (typically 2440mm x 1220mm sheets)
- Decorative metal grille or perforated MDF screening panel
- Circular saw or table saw with a fine-tooth blade
- Jigsaw for cuts and notches
- Pocket hole jig or biscuit jointer
- Cordless drill and driver bits
- Wood glue (such as Titebond II)
- Clamps (minimum two 1200mm sash clamps)
- Orbital sander with 120-grit and 240-grit sandpaper
- MDF sealer or primer and topcoat paint
- Safety gear (respirator mask, safety glasses, ear protection)
Step 1: Take Accurate Measurements
Precision dictates success in woodworking. Begin by placing a straight edge across the front of the radiator and measuring the depth from the wall to the inside of the straight edge. Add 40mm to 50mm to this dimension to guarantee sufficient internal clearance.
Next, determine the height by measuring from the floor up to the top of the radiator, including any mounting brackets. Add another 40mm to 50mm of headspace above the unit to let warm air escape effectively. For the overall width, measure from the far left edge of the plumbing to the far right edge. If you want to enclose thermostatic valves, factor them into the total width, though leaving standard manual or smart valves exposed makes temperature regulation much easier.
Step 2: Create a Cutting List and Cut the Panels
Translate your measurements into a detailed cutting list before touching any power tools. Account for the 18mm thickness of the MDF side panels when calculating the total width of the front face.
Always wear your safety mask and protective goggles before cutting MDF, as the fine dust poses health risks. Support large sheets properly on sawhorses. Use a circular saw paired with a straight-edge guide or a table saw to ensure square, straight cuts. Once all individual panels are cut, lightly sand the exposed edges with 120-grit sandpaper to remove any splintered fibers.
Step 3: Prepare the Front Panel and Vent Openings
The front panel serves as the main visual feature of the cover. Many builders prefer creating a frame-and-insert style or cutting out a large central window to house a decorative metal grille or wooden fretwork screen.
Mark your cut lines on the face panel, leaving a solid border of at least 75mm to 100mm around the perimeter for structural rigidity. Drill pilot holes in the corners of your cutout area, then use a jigsaw to cleanly cut out the interior window. Smooth the interior edges with sandpaper or a router fitted with a chamfer bit to soften the profile.
Attach your decorative grille to the rear side of the front panel using short wood screws, staples, or strong adhesive, ensuring it covers the cutout completely.
Step 4: Assemble the Frame and Attach Sides
Strong joinery keeps the enclosure rigid over years of thermal expansion and contraction. Pocket hole screws or biscuit joints provide robust, hidden connections between the front face and the side panels.
- Drill pocket holes along the interior mating edges of your side panels and top support rails.
- Apply a thin, even bead of wood glue along the joining surfaces.
- Align the side panels flush with the back edges of the front frame assembly.
- Drive pocket screws firmly to lock the components together.
- Check diagonals with a framing square to ensure the entire structure remains square. Clamp tightly and wipe away any excess glue immediately with a damp cloth.
Step 5: Cut Skirting Board Relief Notches
To make the radiator cover sit flush against the wall, you must notch the bottom rear of the side panels to accommodate your room’s skirting boards (baseboards).
Hold a scrap piece of your existing skirting board against the bottom rear edge of the assembled cover and trace its exact profile with a pencil. Use a jigsaw to carefully cut along this line. Test-fit the cover against the wall; shaving off small amounts with a rasping tool guarantees a tight scribe against the wall.
Step 6: Build and Mount the Top Shelf
The top shelf should overhang the front and sides of the cabinet by roughly 20mm to 25mm to create a clean overhang. Cut the top shelf MDF board to these expanded dimensions.
For secure attachment without visible screw heads on top, screw small angle brackets or wooden mounting cleats to the interior upper framing of the cabinet. Set the top shelf upside down on a protected workbench, invert the radiator cover onto it, and drive short screws upward through the internal brackets into the underside of the shelf.
Step 7: Seal, Prime, and Paint Your Radiator Cover
Because raw MDF absorbs moisture and paint unevenly, proper preparation dictates the quality of your final finish. Coat all exposed surfaces-paying special attention to porous cut edges-with a specialized quick-drying MDF sealer or a high-adhesion primer.
Once the sealer dries completely, sand the entire unit lightly with 240-grit sandpaper to eliminate any raised fibers or brush strokes. Wipe away dust with a tack cloth, then apply two to three topcoats of satinwood or eggshell paint. Using a mini foam roller yields a smooth, factory-like finish without visible brush marks.
Step 8: Secure the Cover to the Wall
Unsecured radiator covers can easily tip forward, posing a hazard to children and pets. Anchor the finished unit securely to the wall studs using discreet L-brackets screwed into the underside of the top shelf or upper internal framing. Alternatively, install a quick-release mounting kit so you can effortlessly slide the cabinet away from the wall whenever you need to clean behind the radiator or access plumbing valves.