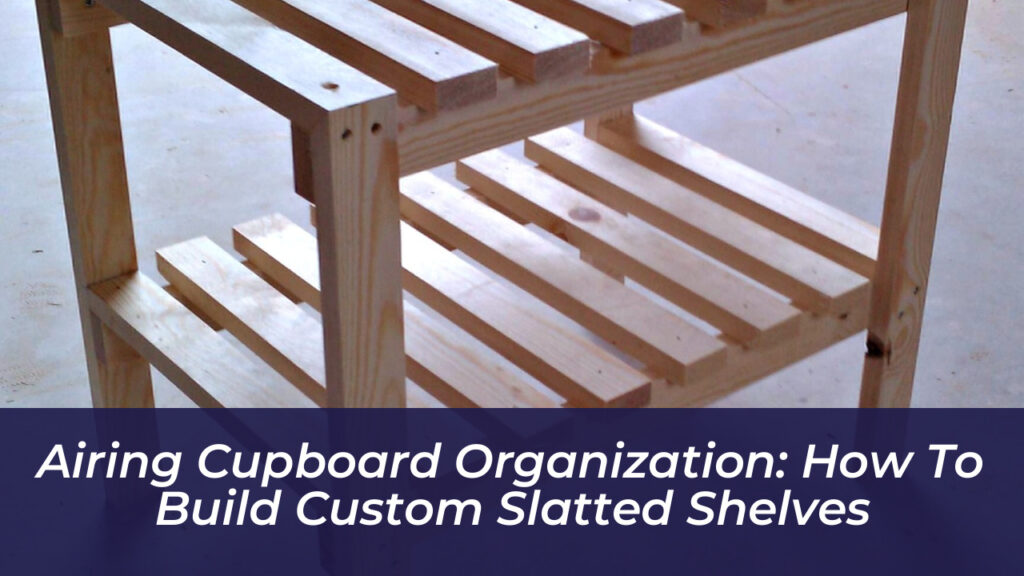
The airing cupboard is often the most neglected space in a home, relegated to a dark, disorganized catch-all for mismatched towels and forgotten bed sheets. When properly organized, however, this space becomes a powerhouse of home efficiency. By installing custom slatted shelves, you transform a chaotic cupboard into a functional linen sanctuary that encourages airflow, prevents musty odors, and keeps your household essentials within easy reach.
Why Slatted Shelves Matter
If you have ever pulled a towel from a cupboard only to find it damp or smelling stale, you are likely dealing with the consequences of solid shelving. Solid boards act as barriers, trapping moisture and blocking the natural heat convection that makes an airing cupboard effective. In a space designed to house a hot water cylinder, heat needs to rise freely through the entire stack of linens to pull moisture away.
Slatted shelves are the gold standard for this environment. By leaving gaps of 15 to 25 millimeters between timber slats, you allow warm air to circulate through your towels and bedding. This constant movement of air ensures that your linens stay crisp and dry, turning your storage area into a dedicated warming zone. Beyond the functional benefits, slatted shelving is often easier to construct and more forgiving when working around existing pipework.
Assessing Your Space
Before buying timber, audit your cupboard. These spaces are often deceptive; they look spacious until you account for the hot water tank, the web of copper pipes, and required safety clearances. Measure the truly usable volume rather than the total dimensions of the closet.
Identify “no-build” zones immediately. Ensure your shelving does not obstruct access to the immersion heater, thermostats, isolating valves, or the cylinder’s pressure relief pipe. If you have an unvented hot water cylinder, never block the tundish or discharge pipe, as these are critical safety components. Take a clear photograph of the cupboard’s interior before starting; it serves as a helpful reference if you ever need to call a plumber for future maintenance.
Choosing the Right Materials
For a durable finish, stick to materials that can withstand the unique climate of a warm cupboard. Planed square edge (PSE) softwood is the standard choice for battens and slats because it is affordable, easy to cut, and provides a smooth surface that won’t snag delicate fabrics.
Avoid timber treated with strong-smelling preservatives. The heat in the cupboard can cause these chemicals to off-gas, potentially transferring unwanted odors to your clean towels. If you choose to finish the wood, use a water-based, unscented varnish or a simple coat of Danish oil. Ensure the finish is fully cured in a well-ventilated area before installing the shelves.
Installing Wall Battens
The strength of your shelving relies on the wall battens-the horizontal supports fixed to the sides of the cupboard. To ensure a professional result, use a spirit level to draw a perfectly straight line around the interior walls where each shelf will sit. Never rely on the ceiling or floor for level measurements, as these are rarely true.
When fixing battens to masonry, use appropriate wall plugs and screws. If you are drilling into stud-work walls, aim to secure your battens directly into the wooden studs. Always use a digital pipe and cable detector before drilling. An airing cupboard is a high-risk zone for hidden plumbing, and hitting a hot water pipe is a mistake you only make once.
Spacing Your Slats
Consistency is the secret to a high-end look. Once your battens are secure, cut your slats to length. To keep the gaps between your slats uniform, create a simple spacing gauge using an offcut of wood. By placing this gauge between each slat as you fix it, you guarantee that every shelf looks identical and that the airflow remains consistent.
If your shelves span more than 700 millimeters, consider adding a front bearer. This is a strip of timber that runs along the front edge of the shelf, connecting the side battens. It provides extra rigidity and prevents the slats from sagging under the weight of heavy winter duvets or thick bath towels.
Handling Difficult Pipework
Rarely does a cupboard provide a perfectly clear, rectangular space. You will likely encounter pipes that run through the area where you intend to place a shelf. Rather than trying to force a shelf into a compromised position, adapt your design. You can cut your slats to terminate just before a pipe, or create a “bridge” around the obstruction by using additional supporting battens.
If you cannot fix a batten to one side due to a large cylinder or pipe obstruction, use a vertical post. A 50x50mm timber post fixed to the floor can provide the necessary support for the end of a shelf, allowing you to maintain a level surface even when the wall is inaccessible.
Organization Tips
Once your slatted shelves are installed, the goal is to maximize utility without overcrowding. Here are a few ways to keep your cupboard in top condition:
- Zone by Category: Dedicate specific shelves to specific items. Reserve the lowest, warmest shelves for towels currently in use, and place seasonal items like winter blankets on the higher, cooler shelves.
- Utilize Baskets: Use breathable wicker or fabric baskets to group smaller items like face cloths or spare pillowcases. This prevents small items from falling through the slats and keeps the space tidy.
- Vertical Hanging: If you have unused vertical space, install a tension rail or hooks under one of the shelves for laundry bags or delicate items.
- Labeling: If you use storage boxes for seasonal bedding, apply clear labels so you can find what you need quickly.
Maintenance and Care
Airing cupboards are low-maintenance, but they aren’t “install and forget” spaces. Every few months, wipe down the slats with a dry, lint-free cloth to remove dust that could transfer onto your clean linens.
Monitor the wood for any signs of swelling or warping due to the heat. If you notice rough patches or splinters developing from the friction of pulling towels in and out, a quick rub with fine-grit sandpaper will restore a smooth surface. If the wood begins to look dry or dull, a fresh coat of oil will keep it protected.
Maximizing Efficiency
The way you stack your shelves dictates how well the cupboard functions. Avoid over-stacking; if you pack the cupboard so tightly that air cannot move between the layers of linen, you negate the benefits of the slatted design. Aim for a “loose stack” approach, leaving a small amount of space between the top of your linen pile and the shelf above.
Avoid placing damp items directly onto the shelves unless you have excellent ventilation. If you must air-dry damp clothes, ensure the cupboard door can be left slightly ajar. Using a cheap digital hygrometer inside the cupboard for the first month can help you understand the humidity levels and ensure your storage area is effectively drying and warming your linens.