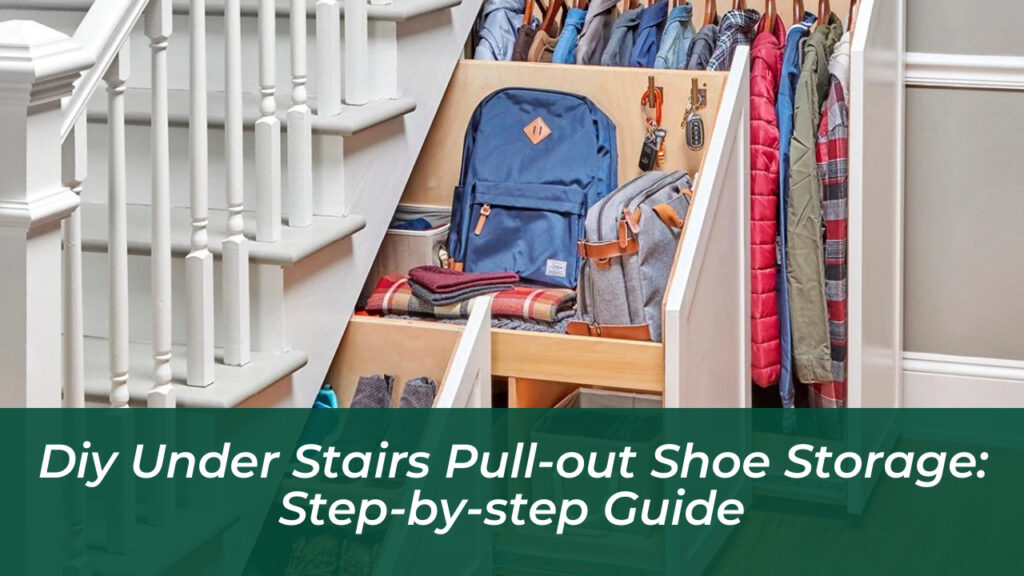
That awkward, dusty triangular void beneath your staircase is arguably the most neglected real estate in any home. While builders prefer to wall it off into oblivion, homeowners waging a daily war against stray sneakers, muddy boots, and rogue sandals know that this hidden cavern holds incredible potential. Building a custom under-stairs pull-out shoe storage system turns dead space into an organizational powerhouse. It replaces chaotic entry piles with sleek, flush-mounted drawers that glide open effortlessly at the touch of a finger.
Tackling this project as a weekend build saves hundreds of dollars compared to hiring a custom cabinet maker, while allowing you to tailor the dimensions precisely to your footwear collection. Whether you need deep pull-out hampers for chunky winter boots or shallow, tiered trays for delicate flats, this comprehensive blueprint guides you through planning, cutting, assembling, and installing your very own stair-cavity shoe drawers.
Assessing the Space and Planning Your Layout
Before you ever lift a circular saw or pry away a piece of drywall, you must understand the unique geometry of your staircase. Stair slopes generally follow an angle of roughly thirty-two degrees, meaning every vertical inch changes as you move deeper under the incline. Start by removing a small inspection square of drywall near the base of the stairs to check for hidden electrical wiring, light switches, or plumbing runs. If an outlet resides within your intended footprint, you will need an electrician to safely relocate it.
Measure the total width of the exposed opening along the floor plate, then measure the height at twelve-inch intervals moving backward toward the back wall. Sketch these measurements to scale on graph paper. This exercise reveals the maximum vertical clearance available for each individual drawer box. Most homeowners find that splitting the total opening into three distinct vertical pull-out sections provides the ideal balance of structural stability, weight distribution, and visual symmetry.
Gathering Essential Tools and Materials
Precision carpentry requires the right gear. Skimping on hardware or sheet goods will lead to sagging drawers, binding slides, and frustration down the road. Make sure your workshop or garage is stocked with reliable supplies before diving into construction.
Required Materials List
- Sheet Goods: Three sheets of 3/4-inch veneer-core birch plywood for robust drawer boxes and heavy-duty frame parts; two sheets of 1/2-inch Baltic birch for internal dividers.
- Framing Lumber: Several lengths of 1×6 poplar or dimensional pine for face frames, drawer slide supports, and wall anchor plates.
- Hardware: Heavy-duty, full-extension ball-bearing drawer slides (rated for at least 100 to 250 pounds depending on how many shoes you own). Soft-close mechanisms or push-to-open magnetic latches add a clean, handle-free finish.
- Fasteners: 1-1/4-inch and 2-inch trim screws, wood glue, and 18-gauge brad nails (5/8-inch, 1-1/4-inch, and 2-inch).
- Finishing Products: Spackling compound, wood filler, primer, satin enamel paint or clear waterborne polyurethane.
Essential Power Tools
- Cordless drill and impact driver combo pack
- Circular saw with a straight-edge guide (or table saw)
- Cordless jigsaw for cutting drywall and notches
- Random orbit sander with 120-grit and 220-grit sanding discs
- Set square, tape measure, and a digital angle finder or bevel gauge
Framing the Opening and Building Drawer Slide Supports
A successful pull-out system relies entirely on a rigid, perfectly square structural frame. If your frame twists, shifts, or bows by even a fraction of an inch, your heavy-duty drawer slides will bind and stick.
Begin by removing any existing baseboards and cutting away the drywall cleanly along the outer perimeter of your layout lines, taking extreme care to avoid cutting into the structural stair stringers. Salvage any framing studs you can, and anchor new 2×4 support plates directly to the concrete slab or subfloor and the vertical wall studs framing the opening.
Next, build T-shaped drawer slide supports using your 1×6 poplar stock, joined together with wood glue and 2-inch construction screws. Because the typical under-stair depth is roughly thirty-six inches, your slide supports must be cut to allow clearance for your chosen drawer slide length. Attach these T-supports directly behind your vertical framing studs using construction adhesive and structural screws. Use a framing square religiously at every step to ensure your supports sit perpendicular to the floor plate.
Constructing the Plywood Drawer Boxes
With the structural framework firmly anchored, turn your attention to building the actual drawer boxes. For shoe storage, durability is paramount because rows of heavy boots and sneakers exert significant downward and outward pressure on the drawer joints.
Calculate your drawer widths by measuring the rough opening and subtracting the exact manufacturer-specified thickness of your drawer slides. Cut your 3/4-inch birch plywood for the bases, backs, and side panels. To prevent shoes from sliding off the back or tumbling into the dark abyss beneath the stairs, ensure every box features a solid back panel.
Apply a generous bead of wood glue to all mating edges, clamp the panels securely to maintain a ninety-degree angle, and drive 1-1/4-inch trim screws through pre-drilled, countersunk pilot holes. For ultimate shoe organization, install a central horizontal shelf inside the deeper boxes, tilting it slightly forward at a ten-degree angle to display your everyday footwear clearly while keeping pairs neatly segregated.
Mastering the Angled Drawer Fronts
The most visually striking aspect of an under-stairs pull-out unit is how seamlessly the drawer faces blend into the existing hallway wall when closed. Achieving this factory-finished look requires meticulous attention to grain alignment and angle matching.
Because the top edge of your drawer faces must follow the exact downward slope of the staircase stringer, use a bevel gauge to capture the precise roof angle. Transfer this angle to your plywood or MDF face panels. If you prefer a classic shaker style, rip solid hardwood frame stock to width, re-saw it into thin trim pieces, and attach them to your drawer faces using wood glue and 5/8-inch brad nails.
Fill any nail holes and edge voids with high-quality spackling compound. Allow the filler to cure completely before sanding all surfaces down with 120-grit sandpaper on a random orbit sander, finishing with 220-grit for a smooth touch ready for priming and painting.
Installing Slides, Drawer Boxes, and Push Latches
The final installation phase requires patience and small adjustments. Mount the cabinet half of your heavy-duty drawer slides directly onto your wooden T-supports, ensuring they are set back the exact thickness of your finished drawer fronts and perfectly level.
Slide the drawer boxes onto the runners. Because heavy-duty slides rarely detach easily, use a 3/8-inch shim and a small 2×4 block underneath the back of the drawer to support its weight while you drive the mounting screws into the drawer sides.
To align your custom drawer fronts flawlessly, drive a couple of short screws from the inside of the drawer box outward until the sharp points barely poke through the exterior face. Position your finished drawer front onto shims to maintain an even, 1/8-inch gap on all sides, then lean it firmly against the protruding screw points. These points leave exact pilot indentations on the back of your drawer face, allowing you to remove the front, drill proper clearance holes, and secure it permanently from the inside with robust wood screws.
Finally, attach your push-to-open magnetic latches to the interior framing. Test the mechanism by pressing the drawer closed until it clicks, ensuring it pops open smoothly without scraping against adjacent baseboards or trim work.
Finishing Touches and Long-Term Maintenance
Once your pull-out drawers operate smoothly, apply two coats of durable satin enamel paint or a protective waterborne polyurethane clear coat to seal the wood against moisture, mud, and scuff marks tracked in from outside shoes.
To keep your new under-stairs storage pristine over years of heavy daily use, consider dropping a few cedar blocks or activated charcoal deodorizer pouches into the corners of the deeper drawers. This simple addition neutralizes shoe odors and absorbs any lingering dampness from wet winter boots. Step back, admire your handiwork, and enjoy a wonderfully clutter-free entryway that transforms dead architectural space into your home’s most brilliant organizational feature.