Walking through a big-box home decor store often leaves you with sticker shock. A basic plaster-look canvas costs eighty dollars, and a tiny ceramic tray can run thirty or forty. You do not need to spend that kind of money to make your space feel styled and intentional. In fact, you can create custom pieces with character right at your kitchen table over a single Saturday and Sunday.
The beauty of handmade accents is that they add texture and warmth without looking like mass-produced catalog filler. Here are seven simple handmade decor projects you can start and finish this weekend, along with realistic budgets, drying times, and step-by-step directions.
1. Plaster-Style Textured Canvas Art
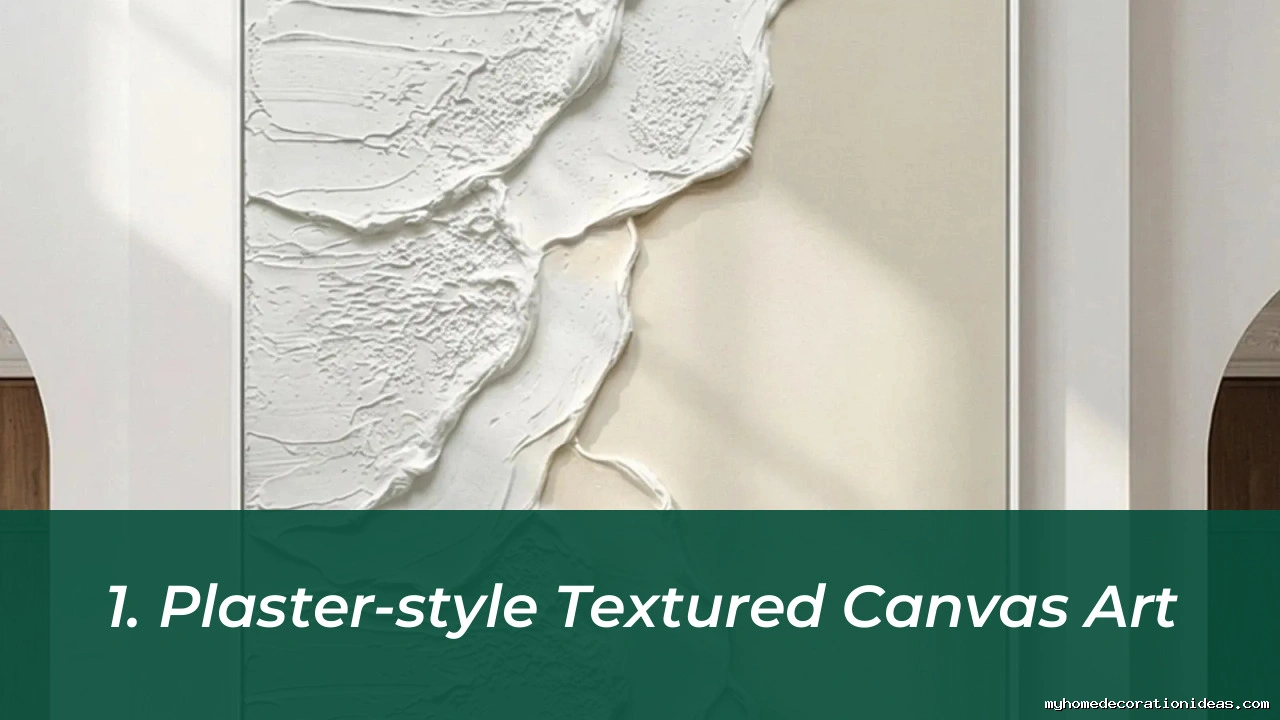
Minimalist, textured art dominates modern interior design right now, but store-bought versions are wildly overpriced. You can make an oversized textured piece using joint compound, a cheap blank canvas, and tools you probably already have in your garage.
Stylist Tip: Layer your joint compound thickly in areas that catch direct sunlight from a nearby window. This creates dramatic shadows across the canvas that change throughout the day.
What You’ll Need:
- Stretched canvas (16×20 or 24×36 inches works great)
- Small tub of premixed joint compound (spackle works too, but joint compound dries slower and is easier to shape)
- Putty knife or a notched tile trowel
- Matte interior wall paint or sample pots in your chosen base color
- Old cardboard or a drop cloth to protect your workspace
Step-by-Step Instructions:
- Lay your canvas flat on a protected surface. Wipe away any loose dust with a dry cloth.
- Scoop a generous dollop of joint compound onto the center of the canvas using your putty knife.
- Spread the compound outward like frosting a cake, keeping it roughly 1/8 to 1/4 inch thick. Avoid going thicker than half an inch, or the plaster may crack as it shrinks.
- Take your notched trowel, an old comb, or the flat edge of your knife to carve arches, horizontal waves, or geometric lines into the wet compound. If you mess up, just scrape it flat and try again.
- Let the canvas dry flat for 18 to 24 hours. Once completely dry to the touch, roll on two light coats of matte paint in an off-white, taupe, or deep terracotta shade.
2. Air-Dry Clay Footed Pedestal Bowl

Small accent bowls are perfect for catching jewelry on a nightstand, holding keys in an entryway, or displaying dried moss on a coffee table. Air-dry clay requires zero baking and dries to an earthy, stone-like finish that you can sand and paint.
Stylist Tip: Leave your clay unpainted and instead rub a tiny amount of dark brown antiquing wax into the surface crevices for an authentic limestone look.
What You’ll Need:
- 1 to 2 lbs of white air-dry clay (Das or Crayola Air-Dry work well)
- Rolling pin or an empty glass jar
- A shallow kitchen bowl to use as a drying mold
- Plastic wrap
- Fine-grit sandpaper (220 grit)
- Clear matte acrylic sealer
Step-by-Step Instructions:
- Roll out your clay on a smooth work surface until it is about 1/4 inch thick. Work slowly so the edges do not fray or dry out prematurely.
- Cut a clean circle using an upside-down dinner plate as your guide.
- Line your kitchen bowl with plastic wrap so the clay will not stick. Gently press your clay circle inside the bowl, smoothing out any air bubbles or folds with damp fingertips.
- Roll out a thick clay rope or three small balls to serve as feet. Score the bottom of the main bowl and the top of the feet with a fork, add a drop of water, and press the feet firmly into place.
- Leave it inside the mold for 12 hours, then carefully turn the bowl out onto a wire rack so the bottom can dry. Let it cure fully for another 24 hours.
- Sand away any rough spots, paint if desired, and coat with two layers of matte sealer to prevent moisture damage. Note that air-dry clay is not food-safe or waterproof.
3. Upcycled Ribbed Glassware and Vases
Most thrift stores have shelves packed with cheap clear glass vases, pickle jars, and wine carafes for a dollar or two. With a pack of wooden skewers or thin round dowels and some chalk paint, you can turn plain glass into a trendy fluted vessel.
Stylist Tip: Pair your fluted vase with dried pampas grass or single-stem ruscus to lean into the organic modern aesthetic.
What You’ll Need:
- Smooth cylindrical glass vase or tall jar
- Pack of round wooden bamboo skewers or 1/8-inch craft dowels
- Hot glue gun and glue sticks
- Pruning shears or heavy-duty scissors
- Baking soda and acrylic paint (or textured stone spray paint)
Step-by-Step Instructions:
- Clean the outside of your glass with rubbing alcohol to remove body oils and label residue.
- Snip the pointed ends off your skewers, cutting them to match the height of your vase.
- Run a thin bead of hot glue down the vase and press a skewer into it. Repeat this process around the entire circumference, pressing each skewer tightly against the previous one.
- Mix your acrylic paint with a tablespoon of baking soda in a plastic cup. The mixture should feel like thick pancake batter.
- Paint the vase using a stiff brush, working the paint into the grooves between the dowels. Apply two to three coats, letting each dry for 30 minutes, until the wood grain disappears and looks like textured ceramic.
4. No-Sew Linen Drop Cloth Cushion Covers
Throw pillows change the entire mood of a living room, but buying four or five new ones every season is expensive. Canvas painter’s drop cloths are 100% cotton, durable, and cost a fraction of traditional upholstery linen.
| Project Detail | Specification |
|---|---|
| Estimated Build Time | 45 minutes per pillow |
| Average Cost | $15 total for 2 to 3 covers |
| Skill Level | Beginner (zero sewing involved) |
| Best Room Placement | Living room sofa, reading nook, bed |
Stylist Tip: Always buy pillow inserts that are two inches larger than your finished cover (e.g., use a 20-inch insert for an 18-inch cover) to ensure a high-end, plump, karate-chop look.
What You’ll Need:
- Bleached or washed canvas painter’s drop cloth (wash it with hot water and dry on high heat to soften the fibers first)
- Fabric scissors
- Ultra-hold fusible bonding web tape (like HeatnBond or Wonder Under)
- Steam iron and ironing board
- Pillow inserts (18×18 or 20×20 inches)
Step-by-Step Instructions:
- Cut your fabric for an envelope-style cover. For an 18-inch insert, cut one front square at 19×19 inches, and two back rectangles at 19×13 inches.
- Create a finished hem on one long edge of each back rectangle by folding the fabric over half an inch, placing your iron-on tape inside the fold, and pressing with a hot steam iron for 10 seconds.
- Lay your front piece flat, right side facing up. Lay the two back pieces on top, right sides facing down, overlapping their hemmed edges in the center.
- Run strips of bonding web along all four outer perimeter edges between the fabric layers. Press each edge firmly with the hot iron, following the package directions for bond time.
- Let the fabric cool down completely before touching it so the glue cures. Reach inside the overlapping envelope flap, turn the cover right side out, push out the corners with a pencil, and stuff with your pillow insert.
5. Scrap Wood Pedestal Riser
A small wooden riser on your kitchen counter or bathroom vanity corrals everyday items like soap dispensers, hand lotions, and small potted plants so they look organized rather than cluttered.
Stylist Tip: Treat raw pine with a coat of grey weathering wash before applying a dark wax to neutralize the yellow tones and mimic reclaimed barn wood.
What You’ll Need:
- A piece of scrap wood (a 1×6 or 1×8 pine board cut to 10 or 12 inches long)
- Four small wooden doll heads, round wooden beads with flat sides, or craft blocks
- Wood glue
- Medium-grit and fine-grit sandpaper (120 and 220 grit)
- Wood stain, tinted wax, or leftover craft paint
Step-by-Step Instructions:
- Sand the top, sides, and corners of your wood board until smooth. Soften the sharp corners slightly to give the board a relaxed, lived-in feel.
- Flip the board over to the underside. Place a dime-sized drop of wood glue near each of the four corners and firmly press your wooden feet into the glue.
- Wipe away any glue squeeze-out with a damp rag immediately, as dried glue prevents stain from soaking into the grain.
- Place a heavy book on top of the inverted riser and let the glue dry for at least two hours.
- Rub your favorite wood stain or wax into the wood using an old cotton rag. Let it soak for 5 to 10 minutes, then wipe off the excess. Once dry, place it next to your sink to elevate your daily essentials.
6. Pressed Botanical Floating Frames
Instead of generic prints from a home goods aisle, real dried greenery adds life and organic color to gallery walls or bathroom shelves.
Stylist Tip: Hang a trio of floating frames vertically in a narrow hallway to create an intentional gallery effect with minimal visual clutter.
What You’ll Need:
- Glass float frames (frames where glass sandwiches your art with no mat board)
- Clippings from your yard (fern fronds, eucalyptus leaves, wild clover, or pansies)
- Heavy books and parchment paper
- Tweezers and a dab of clear craft glue
Step-by-Step Instructions:
- Pick flat leaves or thin petals. Thicker stems contain too much moisture and might rot or keep the glass from closing tightly.
- Place your botanicals between two sheets of parchment paper and slide them inside the pages of a thick dictionary or telephone book. Stack a few extra books on top.
- Let them press for 48 to 72 hours. If you are doing this project over a single weekend, collect your leaves on Thursday evening so they are ready by Saturday morning.
- Clean the interior surfaces of your floating frame glass thoroughly to remove fingerprints.
- Use tweezers to center your dried leaf on the back pane of glass. A tiny pinhead dot of clear glue behind the thickest part of the stem holds it in position.
- Close the top glass layer, latch the frame, and hang it near natural window light where the glass can cast soft shadows on the wall behind it.
7. Pleated Fabric Lampshade Revamp
Plain, cylindrical lampshades can look flat and lifeless. Adding pleats using leftover cotton fabric or linen scraps turns an ordinary thrift-store lamp into a charming, custom fixture.
Stylist Tip: Opt for a fine ticking stripe or vintage gingham fabric to add subtle pattern play and texture to a neutral bedside table.
What You’ll Need:
- An existing plain lampshade (tapered or drum style)
- 1 yard of lightweight cotton fabric (gingham, ticking stripe, or solid linen)
- Fabric glue or a low-temp hot glue gun
- Fabric scissors and clothes pins or binder clips
Step-by-Step Instructions:
- Cut your fabric into a long strip that is about two inches wider than the height of your shade, and at least double the circumference of the shade.
- Fold the top and bottom edges of the fabric strip over by half an inch and press them with an iron so you have clean, unfrayed hems.
- Start at the rear seam of your lampshade. Glue the first half-inch edge of the fabric straight down the shade.
- Create your pleats: fold roughly one inch of fabric back on itself, press it flat, and tack the top and bottom inside rims of the lampshade with a dot of glue. Secure them with binder clips while the glue cools or dries.
- Continue creating folds around the entire drum, keeping the pleat spacing as uniform as possible by eye. When you reach the back seam again, fold the final edge under for a crisp finish and glue it down neatly.
Weekend Project Comparison
| Project | Active Working Time | Dry / Cure Time | Estimated Cost |
|---|---|---|---|
| Plaster Canvas Art | 1 hour | 24 hours | $15 – $25 |
| Clay Footed Bowl | 45 minutes | 24 – 36 hours | $10 – $12 |
| Fluted Glass Vase | 30 minutes | 2 hours | $5 – $10 |
| Drop Cloth Pillows | 1 to 2 hours | 15 minutes (cooling) | $15 – $20 |
| Scrap Wood Riser | 20 minutes | 2 hours | $2 – $5 |
| Botanical Frames | 30 minutes | 48 – 72 hours | $12 – $18 |
| Pleated Lampshade | 1 hour | 30 minutes | $8 – $15 |
My Recommendation
Embracing a handmade home doesn’t require a dedicated workshop or professional crafting skills. By focusing on organic textures, warm woods, and simple fabrics, you can completely transform the feeling of your living spaces in just one weekend. Pick one or two projects that speak to you, clear off your kitchen table, and enjoy the slow, rewarding process of crafting a home with your own hands.