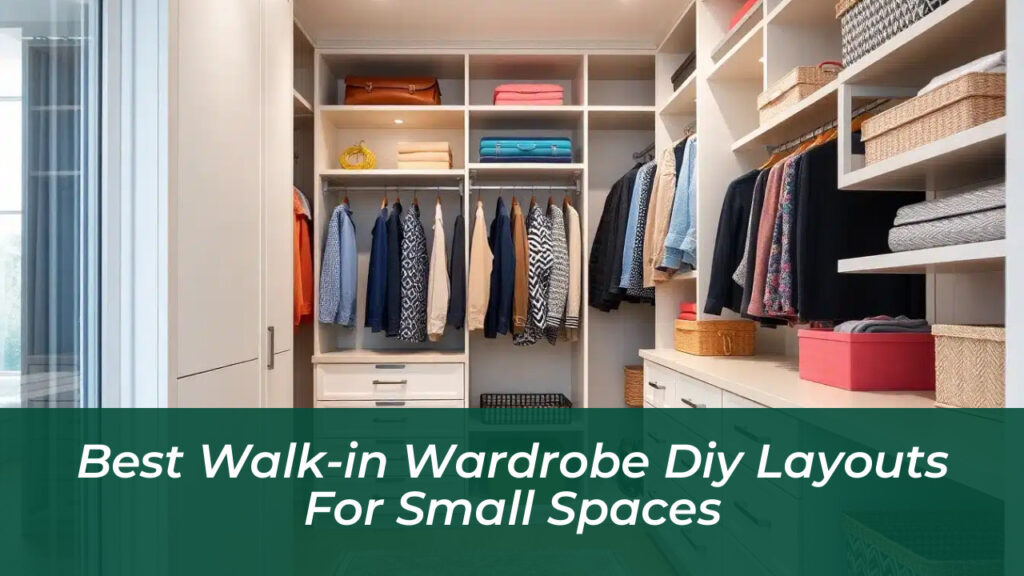
Transforming a cramped closet into a functional dressing room relies on clever planning and simple spatial math. Many homeowners assume a walk-in wardrobe requires massive square footage. In reality, tight spaces often work better because every single inch serves a distinct purpose. Whether you are dealing with an awkward 4×4 nook, a narrow galley, or a spare bedroom corner, a hands-on approach can yield clean, custom results without the custom price tag.
Small Space Constraints and Ergonomics
Before buying lumber or hardware, measure your room dimensions and movement patterns. A standard walk-in needs a central aisle of at least 24 to 30 inches so you can move and bend comfortably. If your room width is under five feet, traditional double-sided hanging will leave you squeezed. In those tight spots, use single-sided hanging on one wall, paired with shallow shelves or peg rails on the opposite side to keep a clear pathway.
Look up. Vertical space is your best asset in a small build. Most closets come with a single clothes rod at standard height, leaving wide gaps near the floor and ceiling. By dividing that height into distinct zones-low shoes, mid-level hanging, and high seasonal storage-you can easily double your storage capacity.
1. The L-Shaped 4×4 Corner Layout
For square footprints measuring roughly four by four feet, an L-shaped setup offers the best return on investment. This layout leaves two adjacent walls open for storage while keeping the corner accessible and the doorway clear.
Wall One: Dedicate this primary wall to double-hanging rods. Stacking a lower rod for pants beneath an upper rod for shirts maximizes vertical space.
Wall Two: Install adjustable open shelving for folded sweaters, denim, and bins. Keep the lower tiers open for shoes you wear every day.
The Corner: Use specialized corner shelves or continuous curved hanging rods so no dead space goes to waste.
2. Narrow Galley Layouts for Long, Tight Rooms
Long, narrow rooms present unique spatial challenges. If your wardrobe resembles a hallway, avoid putting bulky cabinets or deep shelves on both sides, which creates a tunnel effect.
Instead, anchor the short back wall with a tall shoe display or a built-in drawer stack. On one long side, hang your primary clothes. On the opposite, shallow wall, mount slim floating ledges, hooks, or a full-length mirror. The mirror serves a dual purpose: it gives you a place to check your outfit and bounces light across the room to make the space feel wider.
3. The U-Shaped High-Density Configuration
If your small space spans at least five by six feet, a U-shaped layout wraps storage around three walls, surrounding you with organization. This approach mimics high-end boutiques and keeps categories strictly separated.
Assign the back wall to heavy-duty double hanging for everyday clothes. Use the left wall for floor-to-ceiling shelving dedicated to thick sweaters and baskets. Reserve the right wall for wall-mounted hooks, accessories, and a pull-out valet rod to stage tomorrow’s outfit.
Step-by-Step DIY Installation Framework
Executing a closet overhaul requires careful preparation and the right order of work. Skipping steps can lead to sagging shelves and loose hardware.
Assessing and Repairing Walls
Most closet walls are standard drywall. Packed clothing rods and heavy shelving put a lot of outward pull on the wall. Locate your studs using an electronic stud finder and mark them clearly. If your modular layout does not line up with the stud spacing, screw a continuous horizontal wooden ledger board directly into the studs, then mount your upright standards to that board for a rock-solid grip.
Selecting Materials: Plywood vs. Melamine vs. Wire
Your budget and style dictate the material choice. While ventilated wire systems are affordable and fast to install, they lack warmth and can snag delicate fabrics. Melamine boards offer a clean, wipeable finish that mimics custom furniture, though they require careful edge-banding. Real wood plywood, finished with edge veneer and painted to match your bedroom, provides maximum durability and a custom look.
| Material Type | Pros | Cons | Best Use Case |
|---|---|---|---|
| Melamine Laminate | Clean look, scratch-resistant, easy to clean | Heavy, prone to chipping if cut improperly | Modern built-in shelving towers |
| Hardwood Plywood | Incredibly strong, customizable, premium finish | Requires woodworking tools and painting/staining | Visible open shelving and custom drawers |
| Ventilated Wire | Inexpensive, highly modular, quick DIY install | Industrial look, can snag delicate garments | Budget-friendly rental upgrades |
Lighting Tricks to Make Tiny Closets Feel Massive
Dark closets feel smaller and make matching clothes difficult in the morning. Standard overhead lights often cast shadows right where you need to see. Layered lighting solves this.
- Under-Shelf LED Strips: Run adhesive tape lights under shelves to illuminate lower stacks and wipe out dark corners.
- Motion-Activated Puck Lights: Install battery-powered puck lights inside deep cubbies for instant visibility without wiring.
- Backlit Mirrors: A backlit full-length mirror adds a soft glow and creates a boutique feel.
Smart Storage Accessories That Save Space
Maximizing a small layout goes beyond basic shelves. Adding specialized hardware keeps clutter from creeping back in.
Install a hidden pull-out valet rod on an exposed side panel. You can slide it out to stage tomorrow’s outfit or hang clothes while steaming them, then tuck it away flush when you are done. Swap out mismatched plastic hangers for slim, velvet-flocked hangers. Their thin profile saves up to thirty percent of hanging space compared to traditional hangers, instantly making cramped rods feel roomy.
For footwear, skip bulky shoe boxes that waste depth. Instead, use angled shoe shelves with front lips or low-profile pull-out racks near the floor. Storing shoes vertically keeps your collection visible and stops floor clutter from spilling into your walkway.